Are you looking to learn how to install NVMe SSD in PC to improve your computing experience? Installing an NVMe SSD is a great way to increase storage, speed up performance, and make your computer more efficient. But for those of us who don’t have a lot of technical knowledge, the process can seem daunting.
Fortunately, installing an NVMe SSD doesn’t have to be complicated. Let us walk you through the steps of installing a new NVMe SSD in your PC. From choosing the right drive and setting it up properly to formatting it and running tests, we’ve got everything covered on how to install NVMe SSD !
Contents
How to Install NVMe SSD in PC
There are two ways on how to install NVMe SSD in PC:
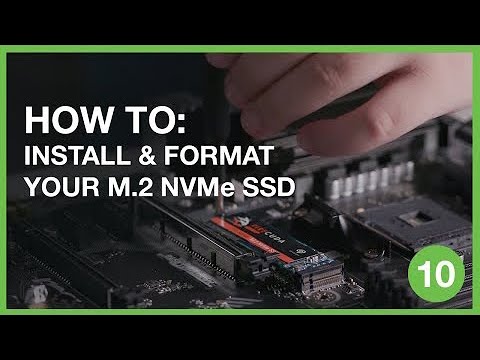
1. The first way is to physically install the NVMe SSD in your PC. This involves opening up your PC case and installing the NVMe SSD into an empty PCIe slot. Once installed, you’ll need to connect the appropriate power and data cables to the SSD. Consult your motherboard’s manual for specific instructions on how to do this.
2. The second way is to install the NVMe SSD in an external enclosure. This is a good option if you don’t want to open up your PC case or if your motherboard doesn’t have any spare PCIe slots. Simply connect the NVMe SSD to the enclosure via a USB or Thunderbolt connection and then follow the instructions that come with the enclosure to format and mount the drive.
The Advantages of Installing an NVMe SSD
One of the advantages of installing an NVMe SSD is that it can decrease the boot time of your computer. An NVMe SSD can also increase the overall speed and performance of your computer. Another advantage of installing an NVMe SSD is that it can extend the lifespan of your computer.
How do I Get my Computer to Recognize NVMe SSD?
If you’re looking to get the most out of your new NVMe SSD, you’ll want to make sure that your computer recognizes it. Here’s a quick guide on how to do just that.
1. Check your system BIOS – The first thing you’ll need to do is check your system BIOS to see if it supports NVMe SSDs. If it does, great! If not, you may need to update your BIOS before proceeding.
2. Connect your NVMe SSD – Next, you’ll need to physically connect your NVMe SSD to your computer. This can be done via an M.2 slot or a PCI Express slot.
- Install any necessary drivers – Depending on your system and setup, you may need to install additional drivers for your NVMe SSD to be recognized properly. Check with your motherboard or SSD manufacturer’s website for more information.
- Format your NVMe SSD – Finally, you’ll need to format your NVMe SSD before you can start using it. This can be done through Windows Disk Management or a third-party tool like AOMEI Partition Assistant Standard Edition.
How to Set up NVMe SSD in BIOS?
In order to set up NVMe SSD in BIOS, you will need to follow these steps:
- Enter the BIOS menu. This can be done by pressing a specific key during bootup, which will differ depending on your motherboard manufacturer. Common keys include F2, F10, and Del.
- Once in the BIOS menu, navigate to the Storage section. Again, this may be titled differently depending on your motherboard manufacturer.
- In the Storage section, you should see an option for NVMe Configuration. Select this option and change it from Disabled to Enabled. Save your changes and exit the BIOS menu.
- Your computer should now boot from the NVMe SSD. If it does not, you may need to change the boot order in the BIOS menu so that the NVMe SSD is listed first.
Can I Plug NVMe in to M 2 Slot?
Yes, you can plug NVMe in to M2 slot. However, there are a few things to keep in mind when doing so. First, make sure that your motherboard supports NVMe. Check the documentation or website for your motherboard to confirm this.
Second, some motherboards have multiple M2 slots and only one will support NVMe while the others do not. Again, check your documentation or website to find out which M2 slot supports NVMe on your motherboard.
Lastly, take note of the length and width of your particular NVMe SSD. Some motherboards have an M2 slot that is too small to accommodate certain sizes of NVMe SSDs. With these things in mind, installing an NVMe SSD in an M2 slot is a relatively simple process.
How do I Activate My M2 SSD?
If you’ve decided to upgrade your PC with a new NVMe SSD, congratulations! This is a great decision that will help improve your computer’s speed and performance. But before you can enjoy the benefits of your new storage device, you need to know how to activate it. Here’s a quick guide on how to do just that:
To start, make sure that your NVMe SSD is properly installed in your PC. Once it is, restart your computer and boot into the BIOS/UEFI menu. There, you should see an option for “Boot Priority.” Select this option and ensure that your NVMe SSD is listed first in the boot order. Save these changes and exit the BIOS/UEFI menu.
Your computer should now boot from the NVMe SSD. If it doesn’t, double-check the boot priority in the BIOS/UEFI menu to make sure that it’s still set correctly. If it is, try unplugging any other storage devices (like hard drives) from your computer and restarting again. This should force your computer to boot from the NVMe SSD.
And that’s all there is to it! Once you’ve completed these steps, your NVMe SSD will be up and running and ready to give your PC a boost in performance.
Final Thoughts on How to Install NVMe SSD in PC
Now that you know how to install NVMe SSD in PC, you are better equipped to make your computer more efficient. Installing an NVMe SSD in a PC is not as difficult as one might think. With a little bit of patience and the right tools, anyone can do it. Just be sure to follow the instructions carefully and take your time. With a little bit of practice, you’ll be able to install an NVMe SSD like a pro in no time!